Lemon Champagne Celebration Cupcakes!

Yes, another Pinterest find!  I saw these and thought they looked really cute and based on ingredients would probably taste pretty good too.  As an added bonus I got to open a bottle of Kenwood Yulupa Sparkling Cuvee Brut, my favorite sparkling wine!

Here's a LINK to the recipe.

It's easy enough to put together, if you have several hours.  The cake needs to cool in the pan for an hour then in the freezer for another hour before you can start assembly.  The recipe calls for jarred lemon curd but I made my own. It's just too easy to make!

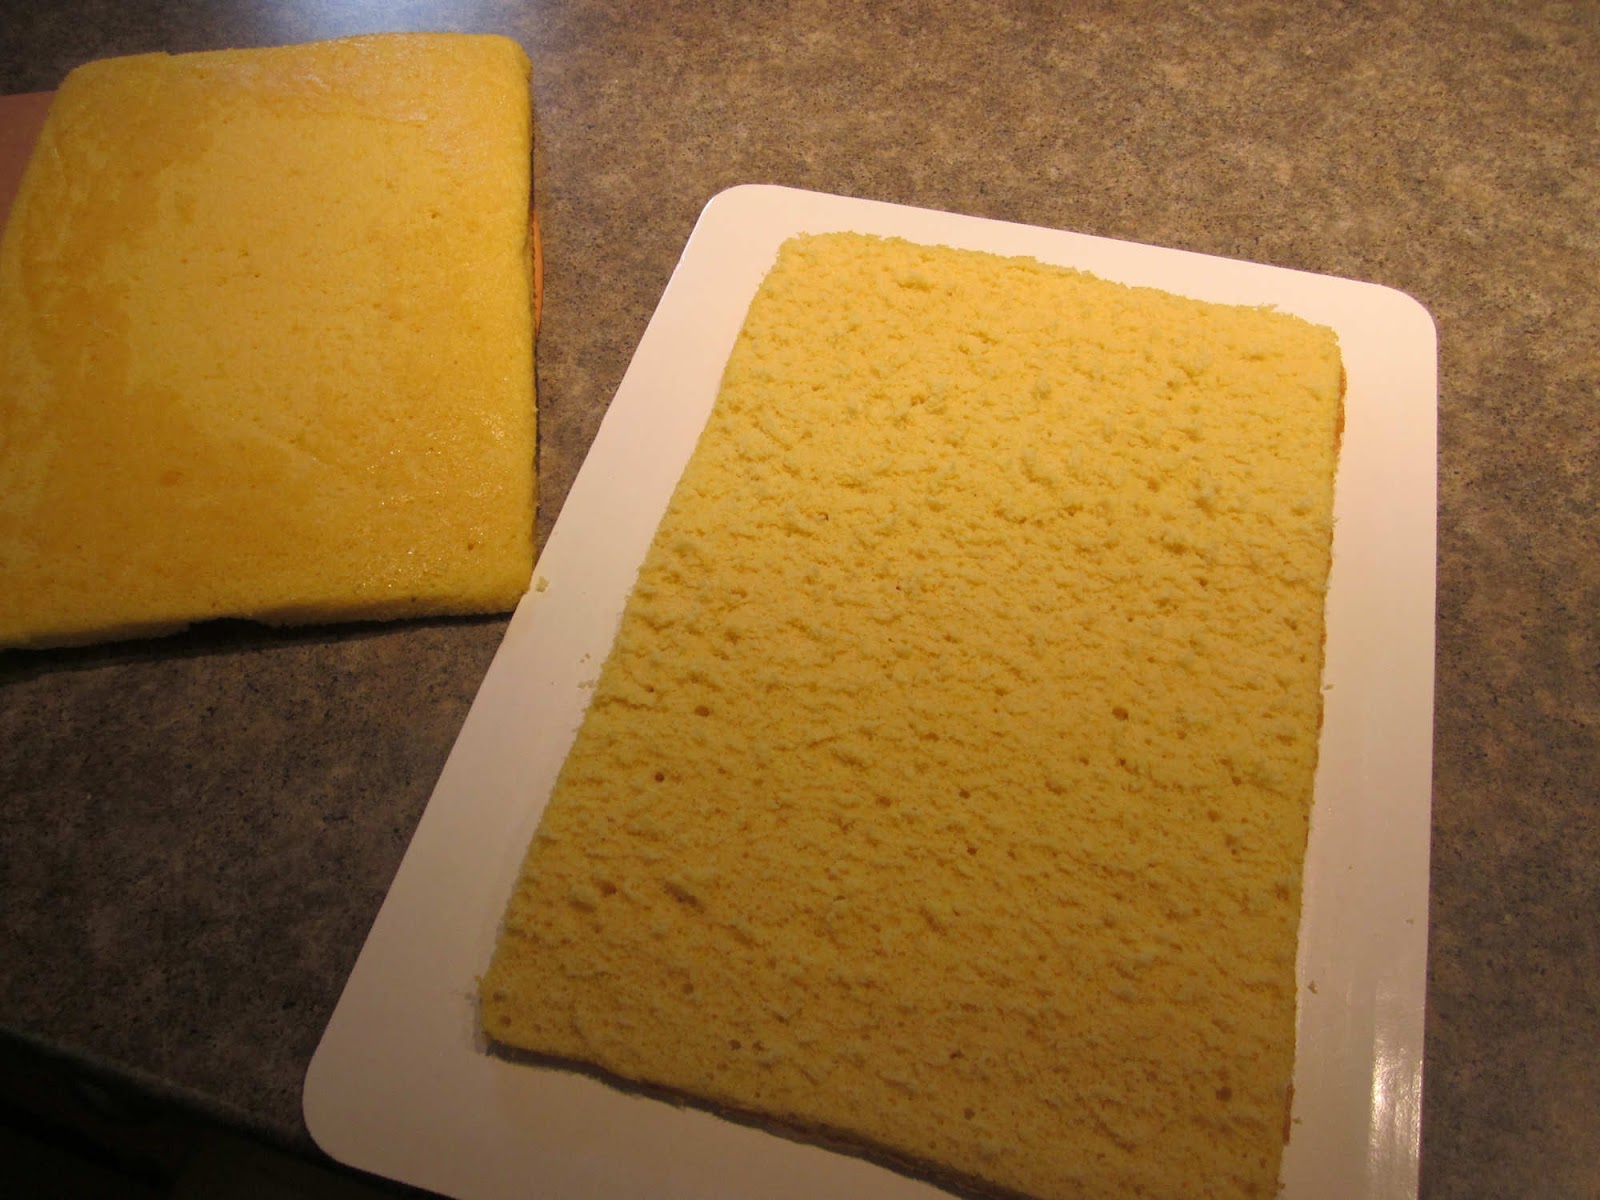
The cakes are baked in rimmed baking sheets, cooled then frozen for an hour.  The freezing helps with the crumbs!

Once cold, circles of cake are cut out, topped with lemon curd, topped with another circle of cake then drizzled with a glaze of butter, powdered sugar and lemon juices.  Seems simple enough right?

Cakes baked up just fine.

Cutting the circles worked just fine.


Adding the curd worked just fine.


Adding the second circle of cake worked... well.. fine, if the circles were completely level.  I learned after a couple I really needed to level the circles.


 The drizzle on top worked just fine too, assuming the cake layers were level!

I embellished with a little lemon zest and voila, Lemon Champagne Celebration Cupcakes.  Sort of.  I didn't have a cutter that was exactly 2 1/4 inches in diameter.  Mine was just between 2 1/4 and 2 1/2 inches which made the "cupcakes" not quite fit in a cupcake holder.


 They were also very unstable!  Maybe a toothpick in the middle would have helped?

So after a half a dozen or so I decided to make mini lemon champagne cupcakes!  They weren't that much more stable.  I will say after they were refrigerated they firmed up a little.


So after that I decided to just torte the other cake I had made, fill it with lemon curd and drizzle it with the glaze!  That worked!


I think this would make a delicious layer cake.  Forget the work of making all the cupcakes, make a regular old layer cake, put the curd between the layers, drizzle the glaze over the top and call it done!  Lots less work and lots less waste!

I will say they were delicious!  Especially with a glass of my Kenwood Yulupa Cuvee Brut!

I sent them to work with my hubby.  They (the "cupcakes I had made as well as the cake) didn't last until lunch!

Inspired by Williams-Sonoma Lemony Eggs Florentine

My intention this morning was to have Lemony Eggs Florentine, from Williams-Sonoma, for breakfast.  It sounded delicious, and almost as importantly, it was something Dave wouldn't eat.  Dave is off with the military again this weekend so I only had to make breakfast for me.  Why wouldn't Dave like it?  He doesn't do yolk!

Here is a LINK to the original recipe.  I made some adjustments thanks to the wonderful world of social networking, a.k.a Facebook and my friends at The Golden Fig.

Yesterday morning The Golden Fig, one of my favorite places to shop, posted that they had fresh local spinach from Burning River Farms in stock.  I replied to their post that I would be in for the spinach and shared a link to the recipe.  They suggested some substitutions that I totally agreed with!

As luck would have it, they had fresh ramps in stock.  What a great substitution for the onions in the recipe!  While I was there I picked up some other local favorites perfect for this recipe including Fisher Family Farms peppered bacon, and Otis Family Farm fresh eggs.


Of course I couldn't pass up A Gourmet Thyme's Cayenne Shortbread.  They have nothing to do with breakfast, I just love them.  These little cookies are so addicting!  I'll try very hard to have a few left for when Dave gets home.  Next time I make shortbread I must remember to add some cayenne.


And, as luck would have it, Snappy Dog has their Rhubarb Salsa out already.  So that went in the basket too.


Ok, back to the recipe.  It's really quite simple.  Saute the spinach and onions, or ramps in my case, in some butter, fry up the bacon, toast the English muffin then top with a perfectly poached egg and hollandaise.

I thought about making the hollandaise.  I really did.  But why would I make hollandaise when in my refrigerator I had some of that yummy habanero aioli from San Pedro Cafe? I couldn't think of a reason so I added yet another local "ingredient" to my breakfast.

I have to give props to Mr. Ruhlman.  This is the first time I've used my Bad Ass Spoon (a.k.a. Egg Spoon) to actually make eggs.  In fact, this is my first poached egg ever.  I've only ever ordered poached when we eat out.  I followed his process, letting the loose white drain off before poaching.  It's a pretty darn pretty egg if I do say so myself.  I'll be poaching again!  I've broken down and purchased the off-set spoons now too.  I'm so in love with the Bad Ass spoon I just know I'll love the off-set spoons.


To assemble the breakfast top the muffin with the spinach mixture, then bacon, then you're beautifully poached egg, top with hollandaise or your favorite aioli and breakfast is served.


Is this not beautiful?  Look at the color of that yolk!  Thank you Golden Fig, Otis Family, Burning River and Fisher Family Farms and, of course, San Pedro Cafe!  So good!  So good!

Now it's time to clean up the kitchen, grab the dogs and walk some of this off.

Does size really matter?

I decided it was time for a new cutting board.  Mine has served me well for the last, I don’t know, 12 or13 years, maybe longer.  It’s warped and even with a non-skid pad under it, it tends to move around and I can’t flip it over any more because it’s so warped.
While visiting OpenSky, I noticed that Tom Colicchio was recommending some beautiful teak cutting boards by Madeira.  I just had to have one, they looked beautiful. I ordered the “jumbo” board.  I’m sure I looked at the dimensions and they seemed big enough but I didn’t compare them to my current cutting board.  That becomes important later.
I happened to blog about another purchase from OpenSky, my copper heat diffusers, and somehow a celebrity chef/writer found my blog.  He said my blog almost made him want to buy the diffusers.  I’d love to know if he actually did.  I use them a lot.  I’ve found when I have things that need to simmer for a long time (where I typically start them simmering then go clean the house or something, I don’t stand there stirring all the time) I do get a circle of overcooked whatever at the bottom of my pot.  With these diffusers, that doesn’t happen!  That makes me happy because the stock, stew, sauce or whatever I'm cooking cooks more evenly.  Even better though, cleaning the cooking vessel becomes so much easier and I don’t have scraped up bits of yuck in my pasta sauce or whatever I’m making! 
Ok, so I digressed.  This celebrity chef/author commented on my blog and said I should have purchased a board from his collection, not the one Tom Colicchio was pitching.  So I took a look at his board.  It’s from Boos and it is maple instead of teak.  This time I looked at the dimensions too.  It’s exactly the same length and width of my current board.  The Madeira teak board is smaller by an inch in the length and two inches in width.  My current cutting board is maybe a half inch thick, hence the eventual warping.  The Madeira board is a little thicker, 1 ¼ inches.  The Boos board is 2 ¼ inches thick!  I don’t think that board is ever going to warp!
My poor warped Board:

The beautiful Madeira Board.  Isn't it beautiful?!


The monstrous Boos Board:


So I already like the Boos board better because it’s the same length and width dimensions as my old board.  It fits perfectly on my island and there's no way this thing is going to warp!  I also love the Madeira board because it is beautiful!  Almost too beautiful to use!  My concern however, is that the Boos board is so much thicker I'll have to wear heels in the kitchen just to be able to chop.
I've seasoned them both well with mineral oil (which took days because of my crazy schedule) and performed a few tests.
I had a cake order and needed to chop chocolate.  I didn't notice anything too odd.  I could chop the chocolate and I wasn't on my tippy toes.  I've rolled fondant, nope, still no issues.  So I think I'll like this board for every day work.  The Madeira, well, I think that will make a beautiful bread / cheese board when we have guests!

No Knead Whole Grain Bread

A "friend" sent me a recipe for whole-grain bread.  I put friend in quotes because a real friend wouldn't have sent me a recipe they knew I would have to try immediately. 

Just look at this LINK and tell me you wouldn't run out and buy these ingredients right away!  Well, there isn't a King Arthur Flour store in my neighborhood so I had to order online and wait patiently for the ingredients to arrive.  I don't stock high protein flour, wheat gluten or malted wheat flakes in my pantry.  Well, at least I didn't used to!  I didn't even know what malted wheat flakes were.

What are all these new ingredients to my pantry?  Well there are two new flours, Sir Lancelot and a 9-Grain Flour blend.  According to King Arthur Flour, what makes whole-grain breads rise, and gives them delightfully chewy texture is this, their highest protein flour.  It has 14.2% protein compared to an all-purpose flour, at 11.7%. 


What the heck is vital wheat gluten you ask?  I've seen it in a lot of recipes and almost always listed as optional so I've never opted to use it.  Vital wheat gluten is like a very fine flour that is all gluten and very little starch.  Technically it's not flour.  It is made from wheat flour that has been hydrated to activate the gluten and then processed to remove everything but that gluten. It's then dried and ground back into a powder.  Because it's almost pure gluten, a little goes a long way to improving the elasticity and rise of the raw dough and the crumb and chewiness in the final loaves.  I opted in this time!


Next is the Malted Wheat Flakes.  I can honestly say I've never heard of these before.  Again according to King Arthur Flour, they are a classic British ingredient, key in their Granary Bread.   They look a lot like toasted rolled oats.


The final unique ingredient is a 9-grain flour blend from King Arthur Flour.  It is made up of hight-protein wheat flour, plus Sustagrain (R) barley, rye, oats, amaranth, quinoa, millet, sorghum and teff!  This is all milled together to create a very fine consistency flour which is very high in fiber.


Making the bread is pretty darn easy.  Dump the ingredients in a bowl, mix it up and let it sit 8 to 12 hours or overnight.  This batch will be overnight!


By the magic of TV it's now the next day!  This is what the dough looks like after proofing all night.  I put it in the covered bowl about 5pm last night and this picture was taken around 12:30 the next day.


The dough is turned out onto a floured surface then put in the baking vessel.  Now the one King Arthur flour uses (if you didn't check out the link above) is this pretty long, thin covered baker.


I don't have a pretty, covered, long, thin baker.  I do have a 5 quart Lodge covered cast iron pot which makes a beautiful loaf of "Artisan Bread in Five Minutes a Day" so I figured it would work just fine for this bread too.  So I put the dough in and pressed it to the edges just like the directions told me to.


The dough is then left to rise again for an hour.  After an hour it not quite half filled my pot


Finally in the oven it goes!  It is baked covered for the first 30 minutes then uncovered until it's done, another 15 or 20 minutes or until it tests at about 205 degrees in the middle.  I can honestly say this is the first time I checked the temperature of my bread!


Then you wait for it to cool.  Lucky for the bread I was busy today and didn't dive right into the hot loaf!


So how was it?  It's good.  Not fabulous but good.  It has a chewy crust and light interior and a definite malty flavor.  I prefer a crisper crust, like that in the Artisan Bread in Five Minutes a Day or the Everyday Bread.  I haven't calculated the nutritional information on this bread but it's got to be pretty good for you compared to other breads with all the fiber in it!

Will I make it again?  Probably, I did buy all the ingredients!

I might try it in a different pan.  It can be baked right on a baking sheet as well.  I might try that too, see how it affects the crust and crumb!

Leftovers

Who doesn't love leftovers?  Well, me, sometimes.  It depends on the leftovers.  Tonight was one of those good leftover nights!

Saturday night I made a new recipe, crab and goat cheese ravioli.  I made the pasta fresh and had a little leftover from the raviolis that I stuck in the frig.  Tonight I pulled out my fun Kitchenaid pasta extruder and made some fusilli!  There is nothing better than fresh pasta and Kitchenaid makes it so easy to make fun pasta.


I had some leftover basil from Saturday night's dinner too so I made pesto.  I love pesto!  It goes together in a snap, keeps in the freezer for a good long time and is great on almost anything!


I also had all of the ingredients left to make that incredibly yummy Caesar salad by Alex Guarnaschelli.  I still can't get over how yummy the fried capers are!


I added a little sauteed asparagus and grilled shrimp to the pasta with pesto, heated up some leftover homemade bread and served it with the salad.  Yep, I love leftovers.  And even better, there's enough pasta left for lunch tomorrow!  Leftover leftovers!


Crab and Goat Cheese Ravioli

I saw this recipe in an issue of Cuisine at Home.  I like Cuisine at Home because most of the recipes are pretty easy so I can whip them up during the week after a long day at work.

The "guts" of the ravioli is just goat cheese, crab, chives, salt and pepper.  Pretty simple.  Even more simple, the recipe called for using won ton wrappers for the dough.  I love to make pasta, I make it all the time, why use won ton wrappers when I can make pasta? So I made pasta

I usually use the recipe my grandmother taught me, 6 cups of flour, two eggs, two tablespoons of oil then more oil and/or water until it "feels right".  I still remember being 9 or 10 years old learning to make pasta with Grandma Cicero.  Grandma was little, maybe five feet tall, and had terribly arthritic hands.  They were all curled up.  I remember as she was teaching me to knead and how to know when it was "right" I would complain that my hands hurt.  I'm still amazed at how strong she was!

Grandma Cicero and Mom in Grandma's Kitchen
I still start kneading by hand, and I still finish by feel, but now I have a Kitchenaid to help with the work!  I mentioned I usually used Grandma's recipe, well, not this time.  I recently purchased a new app for my Ipod, Ratio by Michael Ruhlman.  It's a cool little app and if you want to get better at "throwing things together" without a recipe, I highly recommend it. 


So I used this app to determine to make my pasta this time.  There's no oil in Michael Ruhlman's pasta recipe.  Concern.  I've always made it with oil.  There are a lot of eggs in Michael Ruhlmans' pasta.  Concern.  Oh well, time to try something new!  According to the app, for about a 1 3/4 pounds of flour (about 6 cups) I needed 9 eggs.  Yes 9.  I thought that was a lot of eggs but I plowed on.


The dough came together much more quickly than my "normal" dough but it was stickier.  I added more flour until it felt "right" to me.  Let it rest and worked on making the filling and getting everything set up to make the ravioli.


When Grandma and I made ravioli we did it the hard way.  We rolled out the dough with a wooden rolling pin (not the heavy marble one I later bought for rolling pasta, I'm not as tough as my Grandmother!) and we hand cut them and crimped them with a fork.  They were not aesthetically perfect but they tasted perfect and that's what mattered!

Now I have these cool little ravioli presses that allow me to crank out two dozen ravioli in a matter of minutes.  Add the filling, roll the top (or bottom) layer of dough and out pop these "perfect" little pillows.

I have a pasta roller I attach to my Kitchenaid to roll out the dough too.  No more rolling pin!  No wonder I'm not as strong as my Grandma was.  With my dough, I usually roll it to a #5 on my roller, this dough tore when it was that thin so I used a #4 thickness.  That was really the only difference I noticed in the doughs.


In this recipe the ravioli are fried then steamed, not boiled, then topped with a white sauce made by sauteing garlic slices in butter then adding heavy cream.  Heavy cream is like butter, everything is better with it!  This is reduced, you add a little lemon juice then season with salt and pepper and on the ravioli it goes.


The ravioli was good.  Just good.  Dave and I both prefer either Grandma's ricotta cheese filling or butternut squash (which I happened to have in the house so I made some ravioli with it since I had extra dough).

I also made Alex Guarnaschelli's Caesar salad, which was delicious, and some homemade bread.  Oh and a Cuvaison Pinot Noir too.  Can't forget the wine.

Homemade Pita Bread

Jalapenos have come in at Farmer's Market which has me thinking of all recipes jalapeno.  I'll probably can some too, but that will ...

Popular Posts